ADVERTISEMENT
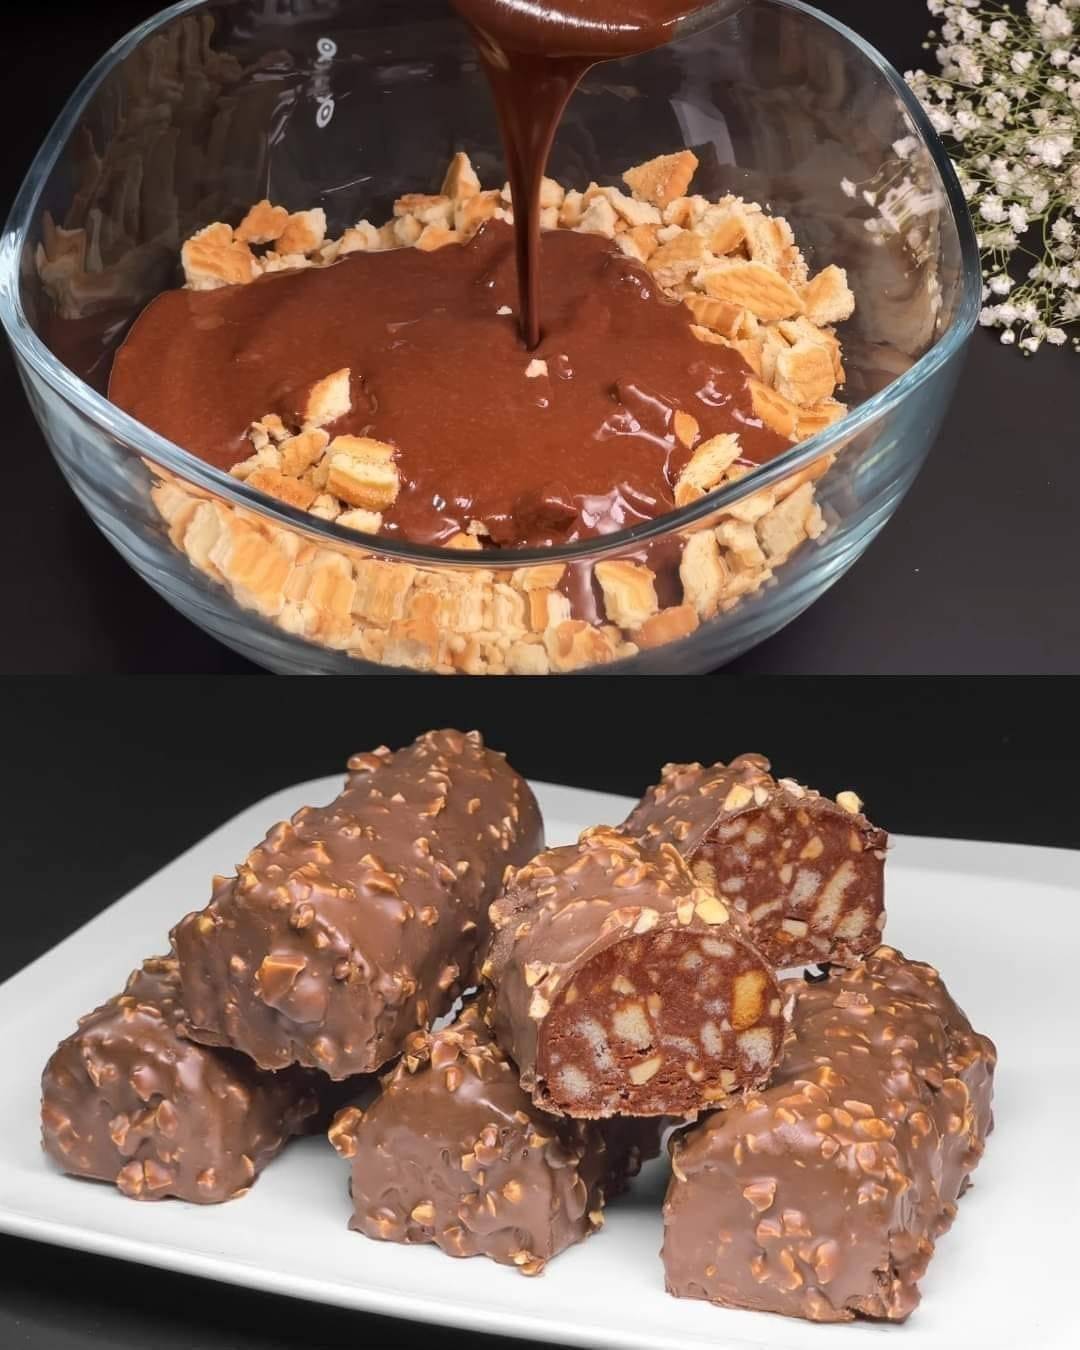
- Pour the melted chocolate mixture over the broken biscuits (and nuts/marshmallows, if using). Stir gently to coat the biscuits evenly with the chocolate, making sure not to crush the biscuit pieces too much.
4. Set the Bars:
- Line an 8×8-inch (or 9×9-inch) square baking pan with parchment paper or lightly grease it.
- Transfer the chocolate-biscuit mixture into the prepared pan and spread it out evenly. Use a spatula or the back of a spoon to press the mixture down firmly, creating a solid, even layer.
5. Chill and Set:
- Place the pan in the refrigerator and allow the chocolate biscuit bars to set for at least 2 hours, or until they are firm and fully chilled.
6. Slice and Serve:
- Once the bars are set, remove them from the fridge and lift the entire mixture out of the pan using the parchment paper (if you used it).
- Cut the chocolate biscuit bars into squares or rectangles.
- Serve and enjoy!
Tips:
- Storage: Store the chocolate biscuit bars in an airtight container in the refrigerator for up to a week.
- Customization: You can mix in your favorite ingredients like dried fruit, seeds, or even a sprinkle of sea salt for extra flavor.
- Chocolate Choice: You can use any type of chocolate you prefer—dark, milk, or even white chocolate. For a creamier texture, you could mix half dark chocolate and half milk chocolate.
These Chocolate Biscuit Bars are a perfect no-bake treat with a delightful crunch and rich chocolate flavor. They’re easy to make, super customizable, and are sure to satisfy your sweet tooth! Enjoy!
ADVERTISEMENT


