ADVERTISEMENT
Step-by-Step Instructions
1. Prepare the Coconut Filling
- In a large bowl, combine the shredded coconut, sweetened condensed milk, vanilla extract, and powdered sugar (if using).
- Mix until everything is well incorporated and the coconut is evenly coated with the sweetened milk mixture. The mixture should be thick and sticky, but easy to shape.
2. Shape the Bars
- Take small portions of the coconut mixture (about 1 tablespoon each) and roll them into small logs or bars. You can shape them to resemble the traditional Bounty bar shape—long and rectangular—or make them bite-sized for easier snacking.
- Place the shaped coconut bars on a parchment-lined tray or baking sheet. Once shaped, refrigerate them for about 30 minutes to firm up. This will make dipping them in chocolate easier.
3. Prepare the Chocolate Coating
- While the coconut bars are chilling, melt the chocolate. You can do this using a double boiler or microwave. If using the microwave, heat the chocolate in short intervals (20-30 seconds), stirring between each until it’s fully melted and smooth.
- Add 2 tablespoons of coconut oil to the melted chocolate and stir to combine. The coconut oil will give the chocolate a shiny finish and make it easier to coat the bars.
4. Coat the Bars with Chocolate
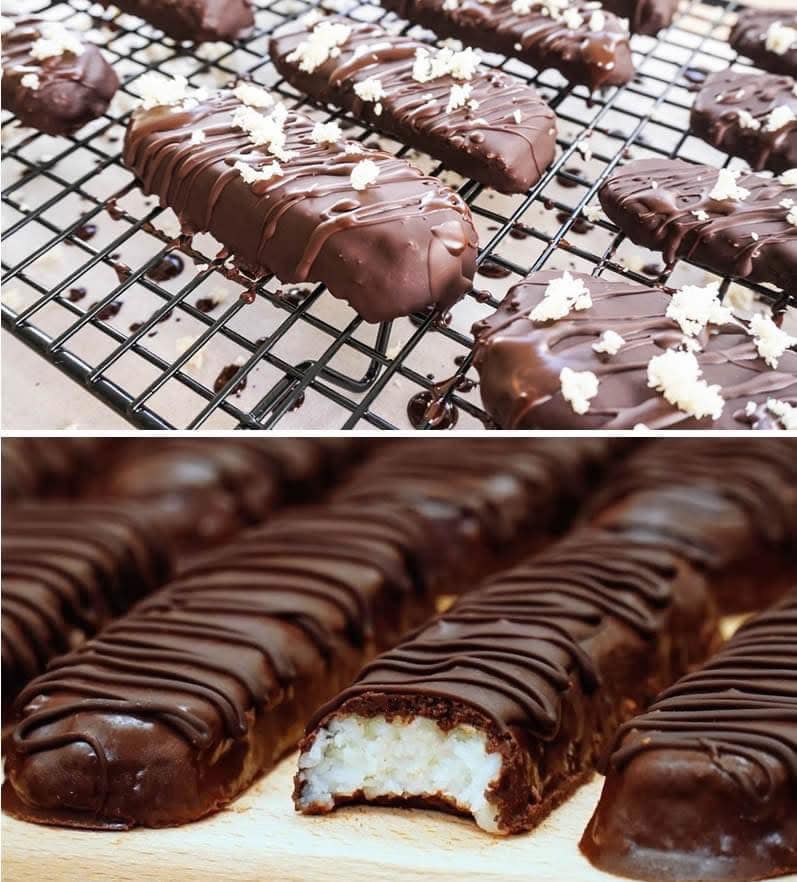
- Once the coconut bars are firm, dip each one into the melted chocolate, ensuring it’s completely coated. You can use a fork to dip and lift the bars, letting any excess chocolate drip off before placing the coated bars back onto the parchment paper.
- If you want to make it extra special, you can sprinkle a little extra shredded coconut on top of the chocolate-coated bars before they set.
5. Let the Bars Set
- Refrigerate the bars for another 30-60 minutes, or until the chocolate has fully hardened.
- Once set, the Coconut Bounty Bars are ready to enjoy!
Tips for the Perfect Coconut Bounty Bars
- Choose Your Chocolate Wisely: You can use dark chocolate, milk chocolate, or even white chocolate for the coating. Dark chocolate pairs nicely with the sweetness of the coconut filling, but feel free to use your favorite type!
- Storage: These bars are best stored in the refrigerator, as the chocolate coating can soften at room temperature. They will keep for up to a week in an airtight container. You can also freeze them for longer storage—just make sure to wrap them individually.
- Add a Twist: Try adding a pinch of sea salt on top of the chocolate for a salty-sweet contrast, or even a sprinkle of finely chopped nuts for some added crunch.
- Extra Sweetness: If you prefer a sweeter coconut filling, adjust the amount of sweetened condensed milk or add a little more powdered sugar to taste.
Serving Ideas
- As a Snack: These bars are perfect for snacking, especially if you’re craving something sweet and satisfying.
- For Parties or Gatherings: Make a batch and serve them on a platter for your guests. They’ll love the homemade touch and delicious flavor!
- Gift Idea: Package these homemade Coconut Bounty Bars in a cute box or jar and give them as a thoughtful gift. It’s a fun and delicious way to show someone you care.
- With Coffee or Tea: Enjoy these bars alongside your favorite hot beverage for the ultimate sweet treat.
Conclusion
These Coconut Bounty Bars are the perfect homemade treat for coconut lovers. With their chewy, sweet coconut center and smooth, rich chocolate coating, they offer a bite-sized indulgence that’s hard to resist. Easy to make and so much better than store-bought, these bars are sure to become a favorite in your recipe collection.
So grab your ingredients, get your hands a little sticky, and enjoy the delightful combination of coconut and chocolate in this irresistible homemade candy!
ADVERTISEMENT
