ADVERTISEMENT
Instructions
1. Prepare the Base (Optional)
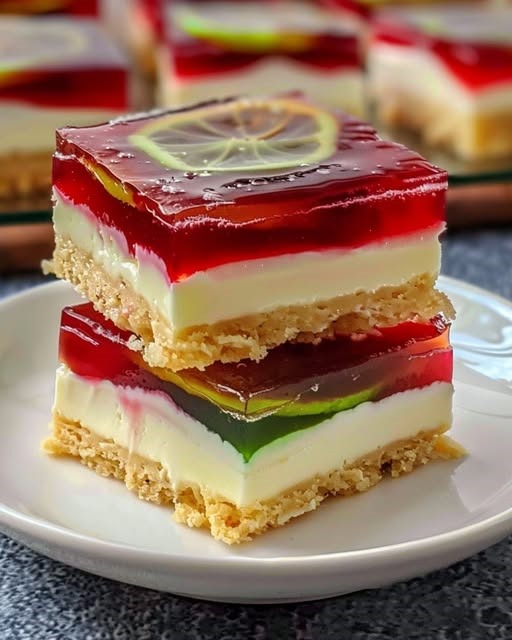
Some variations of the Festive Jelly Slice include a biscuit or cracker base, which gives it a delightful crunch and helps the layers hold together. Here’s how to prepare the base:
- Crush biscuits or graham crackers (about 200g) into fine crumbs. You can use a food processor or place them in a sealed bag and crush with a rolling pin.
- Mix the crumbs with 2 tablespoons of melted butter to create a binding mixture.
- Press the mixture into the base of a greased or lined baking dish to form an even layer.
- Place the dish in the fridge for about 15-20 minutes to set while you prepare the jelly layers.
2. Prepare the First Jelly Layer
- Boil 1 cup of water and dissolve one packet of flavored jelly into the hot water. Stir until completely dissolved.
- Once the jelly is dissolved, add 1/2 cup cold water to the mixture.
- Let it cool slightly before pouring it over the chilled biscuit base (if using).
- Place the dish in the fridge and let it set for about 30 minutes or until the jelly layer is firm.
3. Prepare the Creamy Layer
- While the jelly layer is setting, prepare the creamy layer. In a bowl, sprinkle 1 tablespoon of unflavored gelatin over 1/2 cup cold water. Allow it to sit for about 5 minutes to bloom.
- After the gelatin has bloomed, heat 1/2 cup boiling water in a separate bowl or microwave and pour it over the gelatin mixture. Stir until the gelatin is fully dissolved.
- Add the sweetened condensed milk to the gelatin mixture and stir until smooth. You can also add 1 tablespoon of sugar if you prefer a sweeter creamy layer.
- Once the first jelly layer has set, pour the creamy mixture over the top, creating a smooth, even layer.
- Chill the dish in the fridge for at least 30-45 minutes or until the creamy layer has firmed up.
4. Add the Second Jelly Layer
- Repeat the steps from the first jelly layer. Dissolve the second packet of jelly in 1 cup of boiling water, then add 1/2 cup of cold water. Allow it to cool slightly before pouring it over the creamy layer.
- Place the dish back in the fridge to set for another 30 minutes.
5. Final Chill
Once all layers are set, cover the dish and place it in the fridge for at least 2 hours to ensure that the Festive Jelly Slice is completely chilled and firm.
Serving and Enjoying
Once your Festive Jelly Slice has set and is perfectly chilled, it’s time to slice and serve! Here are a few tips for presentation:
- Use a sharp knife to cut the slice into squares or rectangles, depending on the shape of your dish.
- Serve the jelly slice on individual plates, optionally garnishing with fresh berries or whipped cream for an extra touch of elegance.
- Pair it with a refreshing drink like sparkling water or iced tea to balance the sweetness.
Why You’ll Love It
- Customizable: The beauty of a jelly slice is that you can customize the flavors and colors to suit any occasion. Choose fruity jellies in shades of red, green, orange, or yellow for a holiday theme, or mix pastel shades for a spring gathering.
- No-Bake: This dessert requires no baking, making it quick to assemble and ideal for busy cooks or last-minute gatherings.
- Refreshing: The combination of creamy, fruity layers offers a light, refreshing treat that’s perfect for warm weather or when you need something cool and sweet.
- Fun for All Ages: Both kids and adults will love this dessert. The vibrant colors and fun texture make it a hit with everyone at the table.
Conclusion
The Festive Jelly Slice is a show-stopping dessert that combines delicious layers of fruity jelly and creamy sweetness into one delightful treat. With its simple ingredients and easy-to-follow steps, it’s the perfect option for anyone looking to add a colorful, crowd-pleasing dessert to their next gathering. Whether you’re celebrating a holiday, hosting a birthday, or just treating yourself and your family, this festive treat is sure to bring joy to any occasion.
ADVERTISEMENT
