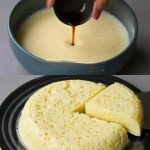
Ingredients
Sugar: 170 g (3/4 cup)
Flour: 400 g (2 1/2 cups)
Vanilla extract: 1 teaspoon
Baking powder: 1/2 tablespoon
Hot milk: 1/3 cup
Butter: 100 g (softened)
Step-by-Step Instructions
Step 1: Preheat and Prepare
Preheat your oven to 350°F (180°C).
Grease and flour a 9-inch cake pan (or line it with parchment paper) to ensure the cake doesn’t stick while baking.
Step 2: Prepare the Dry Ingredients
In a large bowl, sift together the flour and baking powder. This helps to evenly distribute the baking powder and ensures that there are no lumps in your cake batter.
Step 3: Cream the Butter and Sugar
In another mixing bowl, add the softened butter and sugar.
Beat the butter and sugar together using an electric mixer or by hand until light and fluffy. This process usually takes around 3-5 minutes. Creaming the butter and sugar is essential for achieving a soft, tender cake.
Step 4: Add Vanilla and Hot Milk
Once the butter and sugar mixture is well-creamed, add the vanilla extract. This will give the cake its delicious vanilla aroma.
Gradually add the hot milk into the butter mixture while stirring. The hot milk will help to blend the ingredients smoothly and soften the batter.
Step 5: Combine Dry and Wet Ingredients
Slowly add the dry flour mixture to the wet ingredients, mixing gently after each addition.
Continue mixing until the batter is smooth and well-combined, but be careful not to overmix as this can result in a dense cake.
Step 6: Pour and Bake
Read more on next page


